How-to Finish a Basement | Steps to finishing a basement
1. Planning
Planning and Design is the first step to finish your basement.
Planning and Design is the first step to finish and create a beautiful basement. Read more….
2. Layout
Layout and Design is a very important step to finishing your basement.
It is important to decide where all walls, lights, switches, outlets and other mechanicals will be located before you start building. When laying out doors and walls in a basement, great care must be taken as to where they are placed. You always want to be sure you include space for all utilities, built in fixtures and plan ahead for door openings. Spacing of wall studs must also be considered. They cannot be placed just anywhere. Keep in mind that most drywall sheets and other wall finishes come in 4’x 8′ sheets. You will want to layout your walls carefully to avoid floating joints and not waste material. Read more….
3. Framing
Framing and standing walls in your basement
Cut and mark the plates… Using your floor layout as a guide, mark and cut 2x4s for the top and bottom plates. Place them on edge beside each other and mark for the studs. The first stud will be at the end of the wall. The remaining studs should be 16 inches on center, meaning that from the edge of the wall to the center of each stud will be a multiple of 16. Make a mark every 16 inches; then with a combination or speed square draw lines 3/4 inch on each side of your first marks. Draw an X in the middle of the marks to show where to nail the studs.Read more….
4. Framing in Place
How to Frame a Wall in Place or Build a Wall in Place.
If building a wall on the floor and raising it into position is not practical in your situation, You can build a wall in place in your basement. Begin by cutting the top and bottom plates, and marking them for studs. Transfer the marks to the faces of the plates, making sure the marks are clear so you can see them easily to align the studs while toenailing.Install top and bottom plates. Nail the top plate to the joists. Use a level and a straight board to mark the location of the bottom plate or use a chalk line case as a plumb bob. Mark the floor in two places and make an X to indicate on which side of the mark the plate should be positioned. Use masonry nails or a power hammer to fasten the bottom plate to the floor. Read more….
5. Plumbing
Plumbing for your basement. includes Rough and Finish plumbing.
Basements in many newer homes are built with basic plumbing drains and vent stacks built into the basement. This is commonly called stub-outs or stubs. If you see pvc plumbing pipes that look like they just go into the basement floor and lead nowhere, you may already have basic stubs for plumbing. Stub-out plumbing in a basement could include drains for a toilet, tub and shower drains as well as a bathroom sink drain and a vent stack for the future basement bathroom. Don’t worry if you don’t know which pipe is for plumbing. We will go over some basic plumbing terms on our plumbing page. Read more….
6. Electrical
Electrical Home Wiring for your Basement
Read more….
7. Drywall
Hanging Drywall in your Basement
The installation of Drywall, or sometimes hanging drywall as the professionals usually refer to the installation, can be done by the homeowner. Having said that, it is usually best carried out with two or more people as it takes a large amount of lifting of heavy material. Mudding and Taping can also be performed by the homeowner, even so these tasks require some practice and artistry.Read more….
8. Painting
Tips and tricks for painting your basement space
Painting can easily be done by the do-it-yourself homeowner. Listed on our how-to painting page are basic instructions and how-to tips and tricks for painting. Follow these instructions and you will see how simple it is to get great results.Read more…
9. Flooring
Installing flooring in your basement
Installing flooring in your basement can easily be done by the do-it-yourself homeowner. A little bit of water can ruin a very expensive floor quickly. Your primary thought with basement flooring should always be moisture and how to avoid it coming into contact with your new floor. |
How to Finish the Basement Walls
If the walls of your basement are nothing more than bare concrete, you need to start here. Finished basement walls will not only make the space look complete, but also warm and inviting – especially once insulation is added and the drywall is painted.
Here are the steps to take to finish your basement walls:
Step 1: Install Insulation
One of the easiest and most effective ways to insulate a basement’s exterior walls is adding polystyrene foam insulation directly to your foundation walls.
- Cut the pieces of foam to the height of your ceiling minus ¼ inch to allow some wiggle room during installation. You can cut foam insulation using a utility knife or a circular saw. If you use a saw, wear safety goggles.
- Hold your cut insulation against the wall to ensure it is the right height. Remove again before moving to the next step.
- Apply the adhesive in an S shape to the wall where the foam will attach. Let sit for 30 seconds or the amount of time indicated on the bottle.
- Press the sheet into place against the adhesive.
- Repeat the process until you have covered all walls.
- Once all the foam is installed, seal the seams between each piece with duct tape.
- Finally, seal any gaps between the foam and the ceiling, floor and corners with caulk or foam-filler.
Once your installation is installed, you’re ready to frame your walls and install drywall.
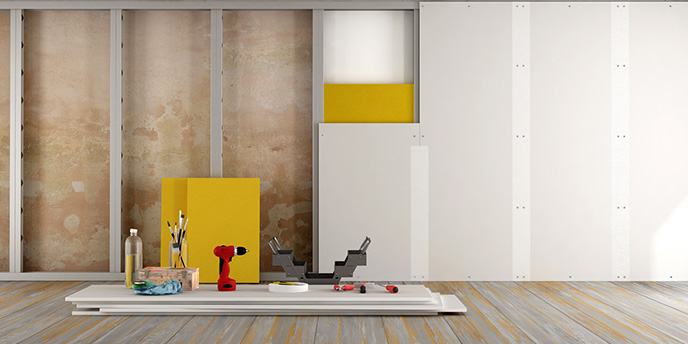
Step 2: Frame Your Walls
Before you begin building your walls, cut all your two-by-fours to the correct length. For the vertical wall joists, subtract the thickness of the top and bottom plates as well as an additional 1/4 inch. This will give you enough space to fit the frames easily against the foundation.
To frame a basement wall:
- For the walls that run parallel to your floor joists, install blocking between the overhead joists and the wall by screwing or nailing a fitted two-by-four to the joists. Install every 2 feet along the parallel walls. You will use these blocks to attach your frames.
- Draw a line the length of each wall that is 4 inches from the wall. This is where you will align the outer edge of the frame.
- Assemble the wall on the ground with the bottom plate nearest to the wall. Attach the wall joists to the top and bottom plates every 16 inches using a framing nailer. Move wall joists as needed to account for doors and windows.
- Tip the wall up and match the outer edge of the bottom plate to the 4-inch line.
- Attach the bottom plate to the concrete floor using a masonry drill, masonry nails and a hammer. Wear hearing protection, dusk mask and safety goggles during this step.
- Attach top plate to the above joists or blocks using your framing nailer and a stepladder. As you move across the wall, hold a level vertically against each wall joist before nailing the top plate above to ensure the wall is sitting flat. If your wall is not level, insert a shim between the top plate and ceiling joists until the wall joists are level and then use the framing nailer to attach it.
Pro Tip for Finishing Your Basement: The wall joists need to be placed every 16 inches on center, meaning the 16-inch mark must be in the middle of the joist. Most tape measures have red markings every 16 inches, indicating where studs should be placed when framing a wall. Wherever you see these marks, make a X 3/4 inches back from the mark, on both the top and bottom plates so you know right where to place the edge of your 1 1/2-inch-thick wall joist.
If your basement doesn’t allow for you to build the wall on the ground and tip it up, or you are completing the project without a second pair of hands, you can always install the top plate and the bottom plates first and then secure the wall joists.
Step 3: Install Drywall
After building your walls, you can begin hanging your drywall. Take into account any outlets or valves by measuring their placement and cutting access holes into the drywall sheet using a drywall knife. For windows, measure out the dimensions and cut the appropriate shape out of the drywall only after you’ve secured the sheet to the wall.
You can choose to hang your drywall vertically or horizontally, though for most homes hanging drywall horizontally is the way to go. You’ll have fewer seams and have an easier time finishing each panel.
To get started:
- Measure to ensure each piece of drywall will end on a stud and trim where needed using your utility knife.
- Secure the drywall to each stud using drywall screws and a drill, making sure not to tear the drywall paper surface. You shouldn’t see any plaster around the nail head.
- Cover seams and screw heads with caulk. Finally, cover seams with drywall tape and then repeat the caulking process.
Now your finished basement walls are ready for paint.